TRADFRI Lチカ
こちらに面白い記事があった。
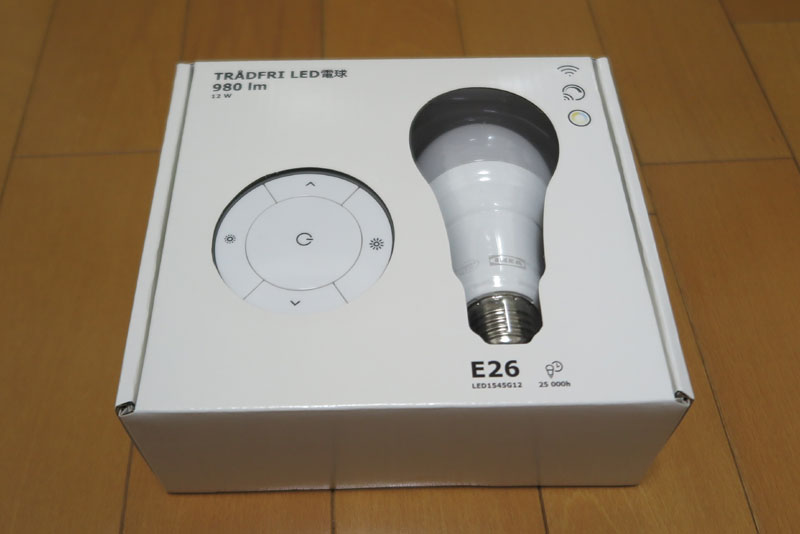
IKEA Tradfri Gatewayがいつの間にか売られていたので、Node.jsでド派手なLチカをしてみる。
nodeとモジュールだけでゲートウェイにアクセスして、LEDを制御できそうな雰囲気。 面白そうなので試してみよう。
ラズパイにnodejsを準備。では作業用フォルダ作成。
mkdir tradfri
そして、移動
cd tradfri
まずはモジュールダウンロード。IKEAのGW向け モジュールが作られているようだ。
npm install node-tradfri-client
これで、node_modulesフォルダが出来て、何かが入った。 では、サンプルソースをコピペしよう。実際には少し勉強がてら、内容をいじった。
// モジュールrequire
var tradfri = require("node-tradfri-client");
// セキュリティコード
var SECURITY_CODE = [※ゲートウェイ裏面のセキュリティコード※];
// クライアントインスタンス生成用
var Client = tradfri.TradfriClient
// 処理関数
async function lightTo(deviceName, onOff) {
  // gateway検索
  const gateway = await tradfri.discoverGateway();
  // console.log('Find gateway:' + JSON.stringify(gateway));
  // client作成
  var client = new Client(gateway.addresses[0]);
  // SECURITY_CODEでトークン取得
  const {identity, psk} = await client.authenticate(SECURITY_CODE);
  // 接続
  await client.connect(identity, psk);
  // デバイス参照
  client.on("device updated", async (device) => {
    // console.log('device:' + JSON.stringify(device));
    if (device.name === deviceName && device.type === tradfri.AccessoryTypes.lightbulb) {
      // 対象デバイスの場合、ライトを制御
      await client.operateLight(device, {onOff, transitionTime:5});
      // 後片付け処理
      setTimeout(() => client.destroy(), 500);
    }
  }).observeDevices();
}

// 処理実行
// LED電球On
lightTo([※IKEAアプリでのデバイス名※], true);
4行目のセキュリティコードは、ゲートウェイ裏面に見ずらい文字で記載されているコード。 よく見ないとわかりにくい。 32行目のデバイス名は、イケアトロードフリアプリでのデバイス名。 不明時には20行目のコメントを外して、適当なデバイス名で実行すると、デバイス一覧がログに出てくるので、 ここから拾う。そして、32行目の2つ目の引数が電球のOn(true)/Off(false)だ。
PC部屋と、電球のある部屋が別なのだが、「transitionTime:5」とあるせいか、実行してすぐ部屋を移動すると、 タイムラグのために、点灯するさまを見ることが出来る。ナイスなLチカだ。
なぜかうまくいっていた処理が、途中からエラーになった。「node-aead-crypto」が必要となった。どのタイミングでエラーになり始めたか不明だが、 とりあえず追加インストールしてやると動いた。
npm install node-aead-crypto
これも一緒に入れておくほうがよいだろう。
状態取得
IKEA電球とは双方向通信となるため、現在の状態を取得することも可能。 上記のclientでの「device updated」で現在の状態が返却されている様子。 電球としては、「lightList」でその内容がわかるようだ。nameが該当の電球に対するlightListを見てみる。
| キー | 内容 | 説明 |
|---|---|---|
| onOff | True/False | 電球の点灯状態 |
| dimmer | 0~100? | 電球の明るさ |
| color | ? | 電球の色 |
| colorTemp | ? | 電球の色温度 |
| colorX | ? | ? |
| colorY | ? | ? |
| isDimmable | True/False | 明るさ変化可否 |
| isSwitchable | True/False | オンオフ可否 |
| spectrum | none/white/rgb | 電球種類? |
| transitionTime | 秒指定 | 変化時間 |
では、これを拾ってみよう。 処理としては、上記関数の18行目「client.on(“device updated”」で取得した「device」 に内容が詰まっているので、
// デバイス参照
client.on("device updated", async (device) => {
  // console.log('device:' + JSON.stringify(device));
  if (device.name === deviceName && device.type === tradfri.AccessoryTypes.lightbulb) {
    // 対象デバイスの場合、状態表示
    console.log(device.lightList[0].onOff);
    // 後片付け処理
    setTimeout(() => client.destroy(), 500);
  }
}).observeDevices();
「対象デバイスの場合、状態表示」のコメント個所で状態をログに吐いて内容を見てみる。
API化(express)
色々操作できるようなので、APIサーバを作成してみよう。 expressを用意して、APIサーバを作成してみる。
mkdir tradfri
cd tradfri
npm init -y
素のプロジェクトが出来たら、expressを入れる。
npm install express –save
express-generatorはすでに入っているので、express-generatorを動かす。 入れてない場合には#「sudo npm install -g express-generator」でインストールしてから行う。
express –ejs
パラメータとしては、「–ejs」ではなく、「–view=ejs」が正解といったメッセージが出ていた。 パラメータが古いのかな?
ヘルプ見ると問題ないように見えるけど。まあ気にせず進める。
npm install
#エラー無くインストールが終われば完了。ひとまず動かしてみよう。
npm start
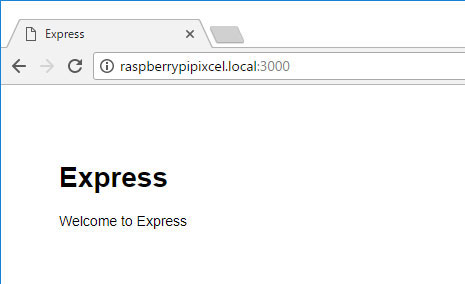
コンソールへのメッセージがしょぼいので、動作状態がよくわからないが、動いたっぽければ、ブラウザでアクセスしてみる。
raspberrypi.local:3000
初期画面が出てくればOKだ。Ctrl+Cで終わらせよう。
開発時はついでにnodemonも入れておく。ソース更新時に自動リロードしてくれるので、 いちいちサービスを停止、起動の手間が省ける。
npm install nodemon –save
起動は「npm start」ではなく
npx nodemon ./bin/www
で動かすようになるのだが、ついでにpackage.jsonも直して、
「npm start」でも同じ動作になるようにしておこう。
nano package.json
{
  "name": "tradfri",
  "version": "0.0.0",
  "private": true,
  "scripts": {
    "start": "npx nodemon ./bin/www" ※ここを修正
  },
  "dependencies": {
    "cookie-parser": "~1.4.4",
    "debug": "~2.6.9",
    "ejs": "~2.6.1",
    "express": "~4.16.1",
    "http-errors": "~1.6.3",
    "morgan": "~1.9.1",
    "node-tradfri-client": "^2.1.8",
    "nodemon": "^2.0.6"
  }
}
6行目の「start」箇所を書き換えて、nodemon動作にしておく。これで、普通に「npm start」することで、nodemon動作となる。
では、ソース修正を開始する。 まずは最初のapp.jsを修正。9行目にtradfri向けルーター作成
var indexRouter = require('./routes/index');
var usersRouter = require('./routes/users');
var tradfriRouter = require('./routes/trd'); ※ここを追加
そして、そこへ誘導する設定25行目にを追加。
app.use('/', indexRouter);
app.use('/users', usersRouter);
app.use('/trd', tradfriRouter); ※ここを追加
「app.jsの修正はここまで。ほかの既存処理は触るのが面倒なので、そのまま残しておく。」
次にtradfri向けルーターの作成。
nano ./routes/trd.js
セキュリティコードとデバイス名はあらかじめ調べてセットしておく。
var express = require('express');
var router = express.Router();

// モジュールrequire
var tradfri = require("node-tradfri-client");
// セキュリティコード
var SECURITY_CODE = '※ゲートウェイのセキュリティコード※';
// クライアントインスタンス生成用
var Client = tradfri.TradfriClient
// 処理関数
async function lightTo(deviceName, onOff) {
  // gateway検索
  const gateway = await tradfri.discoverGateway();
  // console.log('Find gateway:' + JSON.stringify(gateway));
  // client作成
  var client = new Client(gateway.addresses[0]);
  // SECURITY_CODEでトークン取得
  const {identity, psk} = await client.authenticate(SECURITY_CODE);
  // 接続
  await client.connect(identity, psk);
  // デバイス参照
  client.on("device updated", async (device) => {
    // console.log('device:' + JSON.stringify(device));
    if (device.name === deviceName && device.type === tradfri.AccessoryTypes.lightbulb) {
      // 対象デバイスの場合、ライトを制御
      await client.operateLight(device, {onOff, transitionTime:5});
      // 後片付け処理
      setTimeout(() => client.destroy(), 500);
    }
  }).observeDevices();
}

/* GET users listing. */
router.get('/andon/:mode', async function(req, res, next) {
  const deviceName = '※デバイス名※';
  var resMsg = 'tradfri api access[' + deviceName + ']';
  if (req.params.mode.toLowerCase() === 'on') {
    lightTo(deviceName, true);
  } else if (req.params.mode.toLowerCase() === 'off') {
    lightTo(deviceName, false);
  }
  res.send(resMsg);
});

module.exports = router;
ひとまず完成。これで動かしてみよう。 照明をつけるときは、以下へアクセス。照明が点灯すればOK。
http://raspberrypi.local:3000/trd/andon/on
そして、消すときには以下へアクセス。
http://raspberrypi.local:3000/trd/andon/off
これで、点灯と消灯が出来ればOK。 うまくいかないときは、コメントアウトしてあるログ出力(console.log)を活かして、調査しよう。
状態取得も調べたので、これもできるようにしてみよう。
var express = require('express');
var router = express.Router();
// モジュールrequire
var tradfri = require("node-tradfri-client");
// セキュリティコード
var SECURITY_CODE = '※ゲートウェイのセキュリティコード※';
// クライアントインスタンス生成用
var Client = tradfri.TradfriClient
// 処理関数
async function lightTo(deviceName, onOff) {
// gateway検索
const gateway = await tradfri.discoverGateway();
// console.log('Find gateway:' + JSON.stringify(gateway));
// client作成
var client = new Client(gateway.addresses[0]);
// SECURITY_CODEでトークン取得
const {identity, psk} = await client.authenticate(SECURITY_CODE);
// 接続
await client.connect(identity, psk);
// デバイス参照
client.on("device updated", async (device) => {
// console.log('device:' + JSON.stringify(device));
if (device.name === deviceName && device.type === tradfri.AccessoryTypes.lightbulb) {
// 対象デバイスの場合、ライトを制御
await client.operateLight(device, {onOff, transitionTime:1});
// 後片付け処理
setTimeout(() => client.destroy(), 500);
}
}).observeDevices();
}
async function lightGet(deviceName) {
var result = '';
// gateway検索
const gateway = await tradfri.discoverGateway();
// console.log('Find gateway:' + JSON.stringify(gateway));
// client作成
var client = new Client(gateway.addresses[0]);
// SECURITY_CODEでトークン取得
const {identity, psk} = await client.authenticate(SECURITY_CODE);
// 接続
await client.connect(identity, psk);
// デバイス参照
await client.on("device updated", async (device) => {
if (device.name === deviceName && device.type === tradfri.AccessoryTypes.lightbulb) {
// 対象デバイスの場合、情報取得
// console.log('device:' + JSON.stringify(device));
result = device;
// 後片付け処理
setTimeout(() => client.destroy(), 500);
}
}).observeDevices();
return result;
}
/* GET access. */
async function lightGetAccess(req, deviceName) {
// コマンドに合わせてLight処理
var resMsg = 'tradfri api access[' + deviceName + ']';
if (req.params.mode.toLowerCase() === 'on') {
// 点灯
lightTo(deviceName, true);
resMsg += '<br>Light On';
} else if (req.params.mode.toLowerCase() === 'off') {
// 消灯
lightTo(deviceName, false);
resMsg += '<br>Light Off';
} else {
var ret = await lightGet(deviceName);
// 状態返却
// わかりやすく見える用
resMsg = '<pre>' + JSON.stringify(ret, undefined, 1).replace(/\n/g, '<br>') + '</pre>';
// そのまま返却
// resMsg = ret;
}
return resMsg;
}
router.get('/andon/:mode', async function(req, res, next) {
// 「照明」向け処理
const deviceName = '※デバイス名※';
res.send(await lightGetAccess(req, deviceName));
});
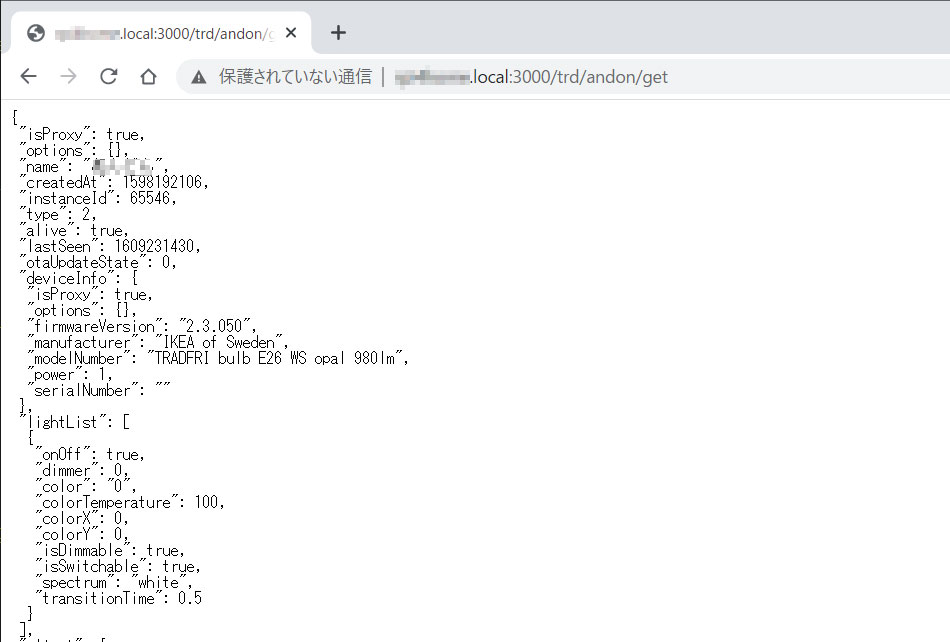
module.exports = router;「get」にアクセスすることで、情報表示ができるようにした。
http://raspberrypi.local:3000/trd/andon/get
デーモン化
なんとなく動作するようになったので、デーモン化してみる。 nodemonで動かしておけば、ソース変更すると自動反映するので、デーモン動作中デモ更新が可能。
まずはサービスファイルを作成するのだが、ここで一つ確認が必要。 起動させるものはすべてフルパス指定が必要なので、npxのありかなどを調べておく必要がある。 たとえば「npx」の場所を調べるには
which npx
で場所を調べる。nvmでnodeを入れているので、nvm管理下の「/home/pi/.nvm/versions/node/v14.15.3/bin」に存在しているようだ。 しかし、なぜかこのままだとデーモン化しても、起動されない。
nvm下のnpxを/usr/local/binに移す
sudo ln -s “$(which node)” /usr/local/bin/node
sudo ln -s “$(which npm)” /usr/local/bin/npm
sudo ln -s “$(which npx)” /usr/local/bin/npx
これで、/usr/local/binで起動出来るようになる。 そのうえで、サービスファイルを作成する。
sudo nano /etc以下の/systemd/system/tradfri.service
内容は以下。
[Unit]
Description =IKEA tradfri control Service App
After=syslog.target

[Service]
ExecStart=/usr/local/bin/npx nodemon /home/pi/share/tradfri/bin/www
WorkingDirectory=/home/pi/share/tradfri
Restart=on-failure
RestartSec=30
KillMode=control-group
TimeoutStopSec=5
StandardOutput=file:/tmp/tradfri.log
Type=simple

[Install]
WantedBy=multi-user.target
「StandardOutput」でテンポラリファイルを指定してあるので、標準出力はここに出力される。
ファイルが出来たら、権限などを上げておく。
sudo chown root:root /etc下の/systemd/system/tradfri.service
sudo chmod 744 /etc下の/systemd/system/tradfri.service
そして、デーモン管理をリロードして新たなサービスを認識してもらう。(やらなくても自動認識されるっぽいけど)
sudo systemctl daemon-reload
デーモン側の認識状態を確認。
systemctl list-unit-files –type=service | grep tradfri
tradfri.service disabled
表示されたから、デーモンとしての認識はされているようなので、起動してみる。
sudo systemctl start tradfri
そして、ログを確認
tail -f /var/log/syslog
実際には「journalctl」を見るのが正解のようだ。
journalctl -u tradfri -e -f
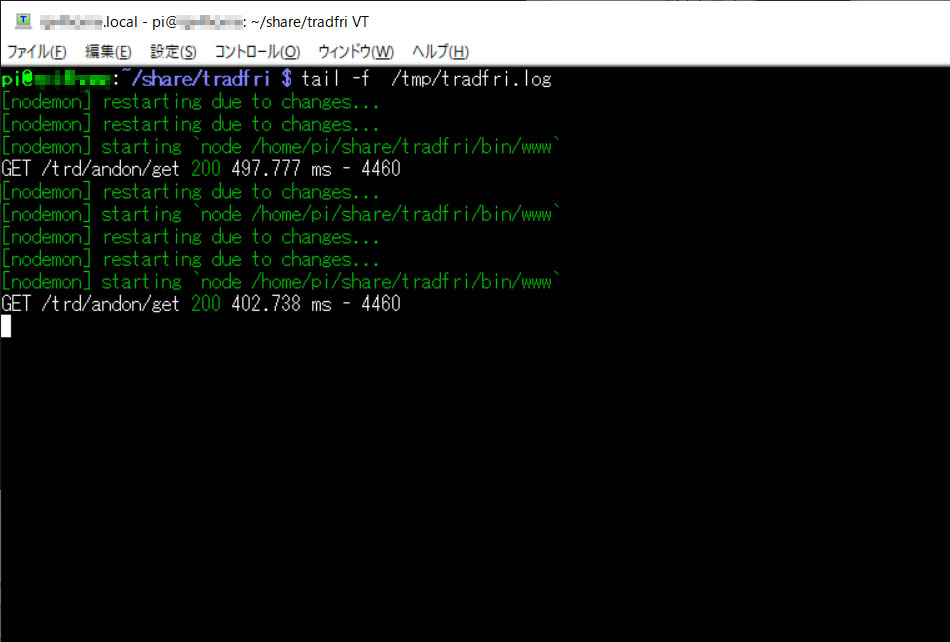
また、標準出力をファイル出力してあるので、通常の手動起動のような状態を見るのはこちら。
tail -f /tmp/tradfri.log
動作に問題ないようなら、常駐化しておこう。
sudo systemctl enable tradfri
これで、ラズパイ起動時に実行されるようになる。
明るさ変更
明るさが変更可能なようなので、実行してみる。on/off変更コマンドの「operateLight」メソッドで、 実行可能なようなので、明るさを変更する関数を用意。
async function lightDimmer(deviceName, setDimmer) {
  // 明るさ変更
  // gateway検索
  const gateway = await tradfri.discoverGateway();
  // client作成
  var client = new Client(gateway.addresses[0]);
  // SECURITY_CODEでトークン取得
  const {identity, psk} = await client.authenticate(SECURITY_CODE);
  // 接続
  await client.connect(identity, psk);
  // デバイス参照
  client.on("device updated", async (device) => {
    if (device.name === deviceName && device.type === tradfri.AccessoryTypes.lightbulb) {
      // 対象デバイスの場合、ライトを制御
      await client.operateLight(device, {dimmer: setDimmer, transitionTime: 3});
      // 後片付け処理
      setTimeout(() => client.destroy(), 500);
    }
  }).observeDevices();
}
デバイスと明るさ(0~100)を渡せば、実行。実際に明るさが変化した。 該当デバイスに対して、「operateLight」メソッドで、[dimmer]に値を渡せばよいだけなので簡単だ。
外部呼出しで実行されるように、「lightGetAccess」関数に組み込む。 「dimmer」と値の指定で、その明るさになるよう指示可能。明るさは0~100になるよう、制御しておく。 あと、今後のデバッグ用にデバイス情報返却コマンドも用意。
/* GET access. */
async function lightGetAccess(req, deviceName) {
  // コマンドに合わせてLight処理
  let resMsg = '';
  if (deviceName) {
    resMsg = 'tradfri api access[' + deviceName + ']';
    if (req.params.mode.toLowerCase() === 'on') {
      // 点灯
      lightTo(deviceName, true);
      resMsg += '<br>Light On';
    } else if (req.params.mode.toLowerCase() === 'off') {
      // 消灯
      lightTo(deviceName, false);
      resMsg += '<br>Light Off';
    } else if (req.params.mode.toLowerCase() === 'dimmer') { ※この辺りを追加
      // 明るさ変更
      let bright = 100;
      if (req.params.tm) {
        if (isFinite(req.params.tm)) {
          bright = Number(req.params.tm)
          if (bright > 100) bright = 100
        }
      }
      // 明るさセット
      lightDimmer(deviceName, bright);
      resMsg += '<br>Light Dimmer ' + bright.toString();
    } else {
      var ret = await lightGet(deviceName);
      // 状態返却
      if (req.params.mode.toLowerCase() === 'pre') {
        resMsg += '<pre>' + JSON.stringify(ret, undefined, 1).replace(/\n/g, '<br>') + '</pre>';
      } else {
        resMsg += '"Device":' + JSON.stringify(ret);
      }
    }
  } else {
    // デバイス指定無しの場合は全情報返却
    var result = '';
    // gateway検索
    const gateway = await tradfri.discoverGateway();
    console.log('Find gateway:' + JSON.stringify(gateway));
    if (req.params.pre) {
      resMsg += '<b>Find gateway</b><br><pre>' + JSON.stringify(gateway, undefined, 1).replace(/\n/g, '<br>') + '</pre>';
    } else {
      resMsg += '"gateway":' + JSON.stringify(gateway);
    }
    // client作成
    var clientAll = new Client(gateway.addresses[0]);
    // SECURITY_CODEでトークン取得
    const {identity, psk} = await clientAll.authenticate(SECURITY_CODE);
    // 接続
    await clientAll.connect(identity, psk);
    // デバイス参照
    await clientAll.on("device updated", async (device) => {
      // 情報取得
      if (req.params.pre) {
        resMsg += '<b>Find Device</b><br><pre>' + JSON.stringify(device, undefined, 1).replace(/\n/g, '<br>') + '</pre>';
      } else {
        resMsg += ',"Device":' + JSON.stringify(device);
      }
      setTimeout(() => clientAll.destroy(), 500);
    }).observeDevices();
    resMsg += '<pre>' + JSON.stringify(result, undefined, 1).replace(/\n/g, '<br>') + '</pre>';
  }
  return resMsg;
}
「dimmer」にアクセスすることで、明るさが変更できる。
http://raspberrypi.local:3000/trd/andon/dimmer/100
色温度変更
明るさ同様に、色(色温度)も変更可能なようなので、実行してみる。 これも「operateLight」メソッドで、実行可能。色温度を変更する関数を用意。
async function lightTemperature(deviceName, setTemperture) {
  // 色変更
  // gateway検索
  const gateway = await tradfri.discoverGateway();
  // client作成
  var client = new Client(gateway.addresses[0]);
  // SECURITY_CODEでトークン取得
  const {identity, psk} = await client.authenticate(SECURITY_CODE);
  // 接続
  await client.connect(identity, psk);
  // デバイス参照
  client.on("device updated", async (device) => {
    if (device.name === deviceName && device.type === tradfri.AccessoryTypes.lightbulb) {
      // 対象デバイスの場合、ライトを制御
      await client.operateLight(device, {colorTemperature: setTemperture, transitionTime: 3});
      // 後片付け処理
      setTimeout(() => client.destroy(), 500);
    }
  }).observeDevices();
}
こちらも外部呼出しで実行されるように、「lightGetAccess」関数に組み込む。 「color」とコマンド(cold/normal/warm)の指定で、色温度を変化させるように指示可能。
/* GET access. */
async function lightGetAccess(req, deviceName) {
  // コマンドに合わせてLight処理
  let resMsg = '';
  if (deviceName) {
    resMsg = 'tradfri api access[' + deviceName + ']';
    if (req.params.mode.toLowerCase() === 'on') {
      // 点灯
      lightTo(deviceName, true);
      resMsg += '<br>Light On';
    } else if (req.params.mode.toLowerCase() === 'off') {
      // 消灯
      lightTo(deviceName, false);
      resMsg += '<br>Light Off';
    } else if (req.params.mode.toLowerCase() === 'dimmer') {
      // 明るさ変更
      let bright = 100;
      if (req.params.tm) {
        if (isFinite(req.params.tm)) {
          bright = Number(req.params.tm)
          if (bright > 100) bright = 100
        }
      }
      // 明るさセット
      lightDimmer(deviceName, bright);
      resMsg += '<br>Light Dimmer ' + bright.toString();
    } else if (req.params.mode.toLowerCase() === 'color') {
      // 色変更
      let bulbTemperature = 58.8;
      if (req.params.tm) {
        if (req.params.tm.toLowerCase() === 'cold') {
          bulbTemperature = 0;
        } else if (req.params.tm.toLowerCase() === 'normal') {
          bulbTemperature = 58.8;
        } else if (req.params.tm.toLowerCase() === 'warm') {
          bulbTemperature = 100;
        }
      }
      // 色セット
      lightTemperature(deviceName, bulbTemperature);
      resMsg += '<br>Light ColorTemperature ' + req.params.tm.toLowerCase() + ':' + bulbTemperature.toString();
    } else {
      var ret = await lightGet(deviceName);
      // 状態返却
      if (req.params.mode.toLowerCase() === 'pre') {
        resMsg += '<pre>' + JSON.stringify(ret, undefined, 1).replace(/\n/g, '<br>') + '</pre>';
      } else {
        resMsg += '"Device":' + JSON.stringify(ret);
      }
    }
  } else {
    // デバイス指定無しの場合は全情報返却
    var result = '';
    // gateway検索
    const gateway = await tradfri.discoverGateway();
    console.log('Find gateway:' + JSON.stringify(gateway));
    if (req.params.pre) {
      resMsg += '<b>Find gateway</b><br><pre>' + JSON.stringify(gateway, undefined, 1).replace(/\n/g, '<br>') + '</pre>';
    } else {
      resMsg += '"gateway":' + JSON.stringify(gateway);
    }
    // client作成
    var clientAll = new Client(gateway.addresses[0]);
    // SECURITY_CODEでトークン取得
    const {identity, psk} = await clientAll.authenticate(SECURITY_CODE);
    // 接続
    await clientAll.connect(identity, psk);
    // デバイス参照
    await clientAll.on("device updated", async (device) => {
      // 情報取得
      if (req.params.pre) {
        resMsg += '<b>Find Device</b><br><pre>' + JSON.stringify(device, undefined, 1).replace(/\n/g, '<br>') + '</pre>';
      } else {
        resMsg += ',"Device":' + JSON.stringify(device);
      }
      setTimeout(() => clientAll.destroy(), 500);
    }).observeDevices();
    resMsg += '<pre>' + JSON.stringify(result, undefined, 1).replace(/\n/g, '<br>') + '</pre>';
  }
  return resMsg;
}
「color」にアクセスすることで、明るさが変更できる。
http://raspberrypi.local:3000/trd/andon/color/cold